Photographs are memories. They remind you of where you came from, who you were with and how you and your family have grown. People have piles of photographs from years of memories. When you want to find a particular photo, it can be difficult to sort through the piles, which is why organization is important. There are many ways of organizing photos into albums, both traditionally and technologically.
Traditional Photo Albums
Traditional photo albums are books where you place your photos in a clear protective sheath. They generally offer inserts for multiple photos per page so you can look at a few at a time. With this type of album, you can organize by time, place or person.
Example: When deciding how to organize photos of children, one way to do this would be to place all photos of one child in one pile and another child in another pile. Then organize in other elements, such as the year, the season, etc. If you want to chronologize your child's life from birth until they are grown, you start by placing baby pictures in the beginning and go from there. Always label these albums with who was there, what you were doing and when it was taken. This will help you find the photos easier when you want them.
Computer and Mobile Albums
One thing technology has given us is the ability to organize everything, including pictures. Most operating systems, Windows, Android and Apple, have the same style of album options so it is fairly simple to streamline the digital organization process.
The first step is to find all of your pictures from your camera, tablet and computer and put them together on one device as well as a backup device such as an external hard drive. Then, organize the same as your traditional album. Start by labeling your new album either by date, place or person, just a name you can remember. Then, go through each photo and add it to its corresponding album. As you go through the photos, you can put one photo into multiple albums. So, if you have one album of a place and another of a person and one photo that has that place and person, that photo can be used in both albums.
If you have traditional photos to add, you can scan them as well. You can scan the pictures with a scanner linked to your computer, take a photo of them with a camera phone or use a photo kiosk and save them onto a memory card. Once the photo is saved, it can be used in a digital photo album. This is a great way to salvage old photos that could otherwise be ruined.
The Cloud
The Cloud is a tool used to keep important files online instead of on your device. Everybody has had that moment when their phone is lost or the computer crashes, taking all of their irreplaceable pictures with it. When you add photos to the Cloud, they are saved virtually, not on your device. You can access them anywhere, anytime, even if you don't have the device. There are options for storage on the Cloud. Google and Microsoft both offer free Cloud storage to a certain limit. Once you reach your limit, you need to pay for more.
Another option is social media. Google+ and Facebook both allow photo uploads and neither have a limit on space. Social media lets you organize into albums so they are still easily accessible. You are also sharing your photos with friends and family immediately so your loved ones don't have to wait to share your experiences with you. Both Google+ and Facebook also offer privacy settings so if you don't want others to see your photos, they won't. These settings can be set so that your photos can be seen only by you, only by friends, friends of friends or everybody. The limit is up to you.
Organizing your photos is simple, although it can be time consuming if you have many photos. By using online methods, you are also saving your photos. When people lose everything in a house fire or robbery, they say that the worst thing they have lost is their pictures. When pictures are stored in the Cloud, they are there forever. The end result of organizing pictures is worth the work you put into it, making your memories once again come to life.
Robert Mizrahi
NYC Professional Home Organizer
NYCOrganizers.com
Advanced Tips on Organizing Your Home and Office from Professional Organizer, Robert Mizrahi, CEO of Chaos Commandos.
Tuesday, November 18, 2014
Tuesday, October 21, 2014
Tips for Organizing a Large Basement
Our basements are one of those places in our homes that are inclined to become overwhelmingly cluttered. The basement is a room where we tend to store all of the junk we've accumulated that we think we might need one day or we put things there just to get them out of the way.
A large basement provides an even larger dumping ground for even more items. It can be next to impossible to find something you need in an unorganized basement. After years of treating your basement as a big storage facility it can seem daunting to even get started organizing it. Here are some tips to get the job done:
1. Eliminate Clutter
The first step to organize any room, including a basement, is getting rid of the clutter. Depending upon how much you have accumulated over time it can be a monumental task in itself and by far the most difficult part of getting organized. Not only can the sheer mass of items in your basement make de-cluttering difficult, but you also have to address sentimental possessions as well as the items you do actually use like sports gear and holiday decorations. Start by sorting and you can make this easier by using labelled boxes. You want boxes for items to donate, boxes for items to sell and boxes for the things you want to keep. Keep your recycling bin and trash bags on hand for the items that simply need to be thrown out.
When you are working in your basement you may want to have a clear space to put your sorting boxes. This way you don't have to keep carrying things up the stairs and coming back down. Instead you can just take up all of the boxes up when you've finished. Going up and down the stairs can make the process a lot more work than it needs to be and you are more likely to become discouraged and less likely to complete the task.
2. Make a Plan
Once you've downsized the clutter it's time to make a plan. Figure out what exactly you want to use your basement for. Do you actually want to use it for storage? Would you rather it just be a place for your utilities or do you maybe want to remodel it into additional living space? After you make this decision everything else you do in your basement should be working toward that goal. A large basement can easily become a multipurpose room that serves all of these different functions.
3. Create Zones
When planning you should designate zones. Your zones are going to be bigger areas of organization and each zone serves a purpose. A utility zone should logically be located near your hot water heater, furnace or other basement appliances and utilities. Keep your utility zone easily accessible in case of an emergency and resist the urge to pile storage boxes there.
Your storage zone should be separate and it's the place where it is acceptable to put all of those items you decided to save as you were de-cluttering. Break your storage zone down into smaller zones so that everything is easy to find. Have a certain place in the zone for your holiday decorations that is separate from your camping gear, for example. A living area zone would include furniture, electronics or maybe a pool table or other form of indoor recreation.
4. Appropriate Storage
In your storage zone in particular you need to decide exactly how you want to save and put away items. Invest in some of those affordable plastic bins or tubs as well as an organizer for them. Label your storage containers and then work to keep them accessible. If you play a lot of different sports year round then you will want your sports equipment to always be where you can find it and get to it.
You only need your holiday decorations during the holiday season so you may want to keep those bins in a less prominent location. To help avoid clutter be sure to put your items away according to your mini-zones and your labels.
Robert Mizrahi
Professional Home Organizer
Chaos Commandos
A large basement provides an even larger dumping ground for even more items. It can be next to impossible to find something you need in an unorganized basement. After years of treating your basement as a big storage facility it can seem daunting to even get started organizing it. Here are some tips to get the job done:
1. Eliminate Clutter
The first step to organize any room, including a basement, is getting rid of the clutter. Depending upon how much you have accumulated over time it can be a monumental task in itself and by far the most difficult part of getting organized. Not only can the sheer mass of items in your basement make de-cluttering difficult, but you also have to address sentimental possessions as well as the items you do actually use like sports gear and holiday decorations. Start by sorting and you can make this easier by using labelled boxes. You want boxes for items to donate, boxes for items to sell and boxes for the things you want to keep. Keep your recycling bin and trash bags on hand for the items that simply need to be thrown out.
When you are working in your basement you may want to have a clear space to put your sorting boxes. This way you don't have to keep carrying things up the stairs and coming back down. Instead you can just take up all of the boxes up when you've finished. Going up and down the stairs can make the process a lot more work than it needs to be and you are more likely to become discouraged and less likely to complete the task.
2. Make a Plan
Once you've downsized the clutter it's time to make a plan. Figure out what exactly you want to use your basement for. Do you actually want to use it for storage? Would you rather it just be a place for your utilities or do you maybe want to remodel it into additional living space? After you make this decision everything else you do in your basement should be working toward that goal. A large basement can easily become a multipurpose room that serves all of these different functions.
3. Create Zones
When planning you should designate zones. Your zones are going to be bigger areas of organization and each zone serves a purpose. A utility zone should logically be located near your hot water heater, furnace or other basement appliances and utilities. Keep your utility zone easily accessible in case of an emergency and resist the urge to pile storage boxes there.
Your storage zone should be separate and it's the place where it is acceptable to put all of those items you decided to save as you were de-cluttering. Break your storage zone down into smaller zones so that everything is easy to find. Have a certain place in the zone for your holiday decorations that is separate from your camping gear, for example. A living area zone would include furniture, electronics or maybe a pool table or other form of indoor recreation.
4. Appropriate Storage
In your storage zone in particular you need to decide exactly how you want to save and put away items. Invest in some of those affordable plastic bins or tubs as well as an organizer for them. Label your storage containers and then work to keep them accessible. If you play a lot of different sports year round then you will want your sports equipment to always be where you can find it and get to it.
You only need your holiday decorations during the holiday season so you may want to keep those bins in a less prominent location. To help avoid clutter be sure to put your items away according to your mini-zones and your labels.
Robert Mizrahi
Professional Home Organizer
Chaos Commandos
Thursday, September 18, 2014
Tips to Set Up and Organize a Garage Sale
A garage sale is a great way to de-clutter your home while also helping people purchase much needed items at reasonable prices. A successful garage sale depends on successful planning. To plan a successful garage sale, simply follow these tips.
Place Items for Sale in Plain View
Place items for sale within plain reach and view of customer's eyesight. For example, if you have a stack of magazines, fan them out on a table as opposed to stacking them on top of each other, so each magazine is in plain view.
If you choose to display items on your lawn, create a pathway that people can walk between and catch a glimpse of each item from all angles.
Move Items Not For Sale Far Away
Move any items that are not up for sale as far away from the sale items as possible to avoid confusion. Or, simply cover the items with a blanket or tarp etc. so buyers know these items are not for sale.
Place Items Close to the Street
Place large or your "best" items as close to the street as possible. This way, people can get a glimpse of what you're selling as they pass by which will hopefully lure them in.
Clearly Mark Your Prices
Place a price sticker on each of your items so you don't forget the price. This will help make your job easier, and people will know exactly how much each item costs.
Having a lot of lower priced items (for example, .25 cent items) may encourage people to purchase more items and even encourage them to purchase higher priced items too, because they feel like they are getting a deal. Price items at yard sale prices, unless the item is brand new with the tags still on.
Collecting Cash
Some sellers prefer to station their cashier's table at the end of their merchandise section to make it easier for customers to pay for their purchases as they leave the sale. This way, customers are free to accumulate a variety of items and pay for them all at once.
You may think about offering carrying baskets etc. to help make it easier for them to carry a large number of items at one time, or simply hold the items for them until they are ready to check out.
Your cashier station should have a ledger for recording sales and enough cash to give change.
Advertise Well
The marketing of your garage sale will generally determine the success of your sale. Put time and effort into making high quality, easily readable signs that will catch people's attention. The bigger and brighter the signs, the better.
Many people experience success on free sites such as Craig's List. The more details you put in your ad, the more likely your items are to show up in searches. Focus on your hottest sellers, and list specific details such as sizes and brands etc.
Teach Your Children Entrepreneurial Skills in the Process
Help your children set up a bake sale and lemonade stand so they, too, can share in the entrepreneurial spirit. If it's fall outside, your children can serve toasty treats such as hot chocolate with marshmallows, coffee, S'mores or even fresh cinnamon rolls which will go a long way in making your customers feel appreciated, especially on a cold Saturday morning.
Getting Organized for Your Garage Sale
Robert Mizrahi
Home Organizing Services
NYCOrganizers.com
Place Items for Sale in Plain View
Place items for sale within plain reach and view of customer's eyesight. For example, if you have a stack of magazines, fan them out on a table as opposed to stacking them on top of each other, so each magazine is in plain view.
If you choose to display items on your lawn, create a pathway that people can walk between and catch a glimpse of each item from all angles.
Move Items Not For Sale Far Away
Move any items that are not up for sale as far away from the sale items as possible to avoid confusion. Or, simply cover the items with a blanket or tarp etc. so buyers know these items are not for sale.
Place Items Close to the Street
Place large or your "best" items as close to the street as possible. This way, people can get a glimpse of what you're selling as they pass by which will hopefully lure them in.
Clearly Mark Your Prices
Place a price sticker on each of your items so you don't forget the price. This will help make your job easier, and people will know exactly how much each item costs.
Having a lot of lower priced items (for example, .25 cent items) may encourage people to purchase more items and even encourage them to purchase higher priced items too, because they feel like they are getting a deal. Price items at yard sale prices, unless the item is brand new with the tags still on.
Collecting Cash
Some sellers prefer to station their cashier's table at the end of their merchandise section to make it easier for customers to pay for their purchases as they leave the sale. This way, customers are free to accumulate a variety of items and pay for them all at once.
You may think about offering carrying baskets etc. to help make it easier for them to carry a large number of items at one time, or simply hold the items for them until they are ready to check out.
Your cashier station should have a ledger for recording sales and enough cash to give change.
Advertise Well
The marketing of your garage sale will generally determine the success of your sale. Put time and effort into making high quality, easily readable signs that will catch people's attention. The bigger and brighter the signs, the better.
Many people experience success on free sites such as Craig's List. The more details you put in your ad, the more likely your items are to show up in searches. Focus on your hottest sellers, and list specific details such as sizes and brands etc.
Teach Your Children Entrepreneurial Skills in the Process
Help your children set up a bake sale and lemonade stand so they, too, can share in the entrepreneurial spirit. If it's fall outside, your children can serve toasty treats such as hot chocolate with marshmallows, coffee, S'mores or even fresh cinnamon rolls which will go a long way in making your customers feel appreciated, especially on a cold Saturday morning.
Getting Organized for Your Garage Sale
- Collect Clutter Year Round- When you come across clutter you longer need, stick it in a box. Once the box is full, fill another one and so on, all the way up until garage sale day.
- Timing is Everything- Choose a time of year when the weather will be pleasant. Check the weather forecast ahead of time to be sure the weather is clear for that day.
- Select a Location- If possible, select a location that is near a busy intersection or a location that is easy to get to.
- Plan- At least 2-3 days before the garage sale, take a day and price and organize everything, and post your ads on the internet. The day before your sale, get your cash together, and post your signs.
- Displaying Your Items- Do you have enough space? How are you going to display your items? Ladders, clothing racks, tables, TV trays, upside down cardboard boxes, crates and even the patio are great ways to display your items. However, it is best to display your items off the ground to avoid ground moisture or dew.
- Select Themes- Group your items in themes to help make them easier to locate.
- Have fun!
Robert Mizrahi
Home Organizing Services
NYCOrganizers.com
Monday, September 8, 2014
How to Organize An Efficient Student Study Area at Home
The busy schedule of today's families can have a direct impact on the quality of study-time a child can dedicate to homework. There's so much going on. Family members stomp around the kitchen looking for a glass of juice, and little brothers and sisters invade bedrooms, but there are alternative ways to create an efficient study area through planning.
Managing Study Time
Coordinate the block of hours your youngster uses for diving into textbooks. This way, they can balance their time with a sibling. Back this strategy with a notice on the door to let everyone know the youngster is at work.
Use the Right Setup
The bedroom is an excellent area to read and write in peace, but the bed itself should be avoided. The vertical surface is tempting, but it's lumpy and giving, not an optimal place to situate pens and the paraphernalia associated with studying. Also, the bed is comfortable, providing too much temptation for a nap.
Study Surface Basics
Opt for a comfortable chair and a wide table, even a foldaway table will do the job, but a solid construct is preferable. Flimsy tables and chairs can cause distractions due to one leg being shorter than the others. Stabilizing the work surface is an easy issue to fix, but the point here is to minimize distractions.
Expanding on Desks
A modular desk setup allows for a basic selection of textbooks and office supplies, and the structure will grow as the child matures, providing extra drawers for sticky labels and stationary. Over the years, this modular approach can be expanded upon, adding more lighting and shelving for heavier textbooks.
Remove Clutter
Children have notoriously short attention spans. Remove toys and smartphones from the study area, promising access to the confiscated items once the work is done for the night. If necessary, move the desk away from the window and take down distracting posters. Clear the desk of any distractions.
An Environmentally Sound Study Space
Maximize the effectiveness of this developing space by adjusting environmental factors if possible. Pull a shade down, and position a bright lamp on the desk, closing windows to mitigate outside noise pollution. Weigh the cost of adjusting the air conditioning against a clear and cool mind.
Dividing the Study Load
Divide the classes your child is studying into manageable chunks. Create a study table and calendar of upcoming academic exams, prioritizing each subject and color coding the schedule for the benefit of young eyes. Print out the schedule, and pin it up on the wall above the new study area.
The Office Supply Visit
Ensure a period of focused study goes uninterrupted by providing all the supplies the student needs. Paper, pens and pencils should be close at hand on the actual work surface. Keep secondary items such as pencil sharpeners and rulers nearby, but remember the clutter rule. Clear space equals a clear young mind.
The Strategic Placement of Secondary Items
Allocate written material to the study area, placing textbooks and study notes in their designated slots. Slowly shift this responsibility over to the child, using this technique to teach organizational planning to the student. In time, this will show the young mind how to manage resources without being overwhelmed.
Energize the Study Area
Studying is hard work. Even putting work into the efficient setup of a study space is a laborious task. Feed the creative spirit of the youngster. Add a flowering plant to all of this study material, and pin up an inspirational poster adjacent to the schedules. Finally, add a glass of water and an energy snack to the newly configured study space, and leave your child to get on with the work. You may be that final distraction, after all.
Robert Mizrahi
Professional Home Organizer
NYCOrganizers.com
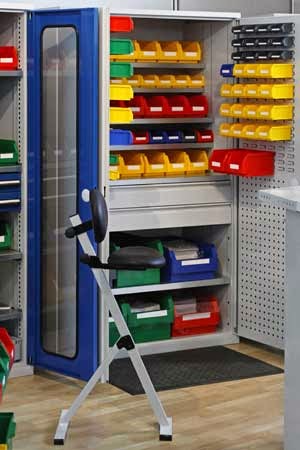
Managing Study Time
Coordinate the block of hours your youngster uses for diving into textbooks. This way, they can balance their time with a sibling. Back this strategy with a notice on the door to let everyone know the youngster is at work.
Use the Right Setup
The bedroom is an excellent area to read and write in peace, but the bed itself should be avoided. The vertical surface is tempting, but it's lumpy and giving, not an optimal place to situate pens and the paraphernalia associated with studying. Also, the bed is comfortable, providing too much temptation for a nap.
Study Surface Basics
Opt for a comfortable chair and a wide table, even a foldaway table will do the job, but a solid construct is preferable. Flimsy tables and chairs can cause distractions due to one leg being shorter than the others. Stabilizing the work surface is an easy issue to fix, but the point here is to minimize distractions.
Expanding on Desks
A modular desk setup allows for a basic selection of textbooks and office supplies, and the structure will grow as the child matures, providing extra drawers for sticky labels and stationary. Over the years, this modular approach can be expanded upon, adding more lighting and shelving for heavier textbooks.
Remove Clutter
Children have notoriously short attention spans. Remove toys and smartphones from the study area, promising access to the confiscated items once the work is done for the night. If necessary, move the desk away from the window and take down distracting posters. Clear the desk of any distractions.
An Environmentally Sound Study Space
Maximize the effectiveness of this developing space by adjusting environmental factors if possible. Pull a shade down, and position a bright lamp on the desk, closing windows to mitigate outside noise pollution. Weigh the cost of adjusting the air conditioning against a clear and cool mind.
Dividing the Study Load
Divide the classes your child is studying into manageable chunks. Create a study table and calendar of upcoming academic exams, prioritizing each subject and color coding the schedule for the benefit of young eyes. Print out the schedule, and pin it up on the wall above the new study area.
The Office Supply Visit
Ensure a period of focused study goes uninterrupted by providing all the supplies the student needs. Paper, pens and pencils should be close at hand on the actual work surface. Keep secondary items such as pencil sharpeners and rulers nearby, but remember the clutter rule. Clear space equals a clear young mind.
The Strategic Placement of Secondary Items
Allocate written material to the study area, placing textbooks and study notes in their designated slots. Slowly shift this responsibility over to the child, using this technique to teach organizational planning to the student. In time, this will show the young mind how to manage resources without being overwhelmed.
Energize the Study Area
Studying is hard work. Even putting work into the efficient setup of a study space is a laborious task. Feed the creative spirit of the youngster. Add a flowering plant to all of this study material, and pin up an inspirational poster adjacent to the schedules. Finally, add a glass of water and an energy snack to the newly configured study space, and leave your child to get on with the work. You may be that final distraction, after all.
Robert Mizrahi
Professional Home Organizer
NYCOrganizers.com
Saturday, July 19, 2014
How To Organize Your Kid's Playroom
Organizing your kid's playroom is a lot easier than you might think. Regardless of how many kids you have and how many toys need to be organized, there is a way. You simply have to figure out how you are going to organize - which may involve being a little creative so that you can keep the room looking clean, while your kids will be able to get behind the organization that you have put into place, all at the same time.
Sort What They Don't Play With
Your kid's playroom likely has all sorts of stuff in it - and some stuff may not even be played with anymore. You need to get rid of anything that isn't being used so that it doesn't clutter up the room. This is where you may want to involve the kids. Go through everything. If they haven't played with it in the past three months, donate it, sell it at a garage sale, or toss it to the curb.
If there are any seasonal toys, then you may want to set these aside in a different area of the room. This can include anything from Easter coloring books to Christmas puzzles. Place them in a tote or something that is marked seasonal so you know to bring it down and into the playroom when the holidays approach.
There may also be some broken items that have made their way into the playroom. Either fix them or toss them. Many parents are surprised by how many items are still lingering in the kid's playroom when they start to organize. Just because you told your kids to throw something away a few months ago doesn't mean they actually did.
Group the Toys
You need to start making piles with all of the toys for some kind of classification system. You may want to label things as dolls, make believe, arts & crafts, and various other categories based upon what you have in front of you. It can also be a great idea to take advantage of a home organizing service where someone will come in and do all of this for you.
He or she is likely going to help you not only with the playroom but also in other areas of your home. This ensures that you don't end up with an "overflow" room where things simply just appear because they don't have an actual home within your home. This is often what happens when kid's toys start piling up in a room. They do so because your kids just don't know where they go.
Get Creative
It may be possible to use the closet as a way to store many of the toys and odds and ends. This may include milk crates, shelves, or various other forms of organization. You have to work within your budget, so you may have to get a little creative in terms of what you can store things in. That labeling system is going to be your best friend so that everyone knows what's inside without spilling the contents onto the floor.
A closet organizing service can help you to understand what needs to be done within the playroom. There are all sorts of creative ways that a professional home organizing service can help you so that children know where everything goes and keep it nice and neat moving forward.
Organizing a playroom always comes down to what works best for the kids. Since they are the ones spending the most time inside the room, the organization has to work for them - and make sense to them. If they don't like what you did to their room, it's only going to be a matter of time before everything is right back to where it was.
A professional home organizing service can help you to make sense out of the chaos. They have experience with organization and can help to determine what's going to be best for your kids - which often includes asking your kids what they want to see for their toys. And regarding your budget, they can help find an affordable way to keep the toys organized now and in the future. Your kids may even find toys that they forgot existed once it is all clean and labeled.
Robert Mizrahi
Professional Organizer in NYC
Chaos Commandos
Sort What They Don't Play With
Your kid's playroom likely has all sorts of stuff in it - and some stuff may not even be played with anymore. You need to get rid of anything that isn't being used so that it doesn't clutter up the room. This is where you may want to involve the kids. Go through everything. If they haven't played with it in the past three months, donate it, sell it at a garage sale, or toss it to the curb.
If there are any seasonal toys, then you may want to set these aside in a different area of the room. This can include anything from Easter coloring books to Christmas puzzles. Place them in a tote or something that is marked seasonal so you know to bring it down and into the playroom when the holidays approach.
There may also be some broken items that have made their way into the playroom. Either fix them or toss them. Many parents are surprised by how many items are still lingering in the kid's playroom when they start to organize. Just because you told your kids to throw something away a few months ago doesn't mean they actually did.
Group the Toys
You need to start making piles with all of the toys for some kind of classification system. You may want to label things as dolls, make believe, arts & crafts, and various other categories based upon what you have in front of you. It can also be a great idea to take advantage of a home organizing service where someone will come in and do all of this for you.
He or she is likely going to help you not only with the playroom but also in other areas of your home. This ensures that you don't end up with an "overflow" room where things simply just appear because they don't have an actual home within your home. This is often what happens when kid's toys start piling up in a room. They do so because your kids just don't know where they go.
Get Creative
It may be possible to use the closet as a way to store many of the toys and odds and ends. This may include milk crates, shelves, or various other forms of organization. You have to work within your budget, so you may have to get a little creative in terms of what you can store things in. That labeling system is going to be your best friend so that everyone knows what's inside without spilling the contents onto the floor.
A closet organizing service can help you to understand what needs to be done within the playroom. There are all sorts of creative ways that a professional home organizing service can help you so that children know where everything goes and keep it nice and neat moving forward.
Organizing a playroom always comes down to what works best for the kids. Since they are the ones spending the most time inside the room, the organization has to work for them - and make sense to them. If they don't like what you did to their room, it's only going to be a matter of time before everything is right back to where it was.
A professional home organizing service can help you to make sense out of the chaos. They have experience with organization and can help to determine what's going to be best for your kids - which often includes asking your kids what they want to see for their toys. And regarding your budget, they can help find an affordable way to keep the toys organized now and in the future. Your kids may even find toys that they forgot existed once it is all clean and labeled.
Robert Mizrahi
Professional Organizer in NYC
Chaos Commandos
Saturday, June 7, 2014
How to Organize Your Recipes
Are you a person who loves to cook, but loathes the dreaded recipe search? Organize your recipes for a cleaner counter top, to protect your heirloom recipes, and to create a more inviting space for entertaining and a more enjoyable cooking experience! You can even enlist the aid of a professional kitchen organizer to help you organize your kitchen space and your recipes.
The Benefits or Organizing Your Recipes
Over the years, recipes passed down from your grandmother or mother, torn from magazine pages, or even printed from your favorite online sites can really begin to add up. Then, when it comes time to finally trying them, you can't locate them, or it takes you forever to find them, which can really zap the fun and energy out of cooking.
Organizing your recipes helps take the stress out of cooking by helping you organize and manage your recipes for easy retrieval every time. Well organized recipes can help unclutter your counter tops, junk drawers, cookbooks, and recipe boxes and make using recipes adventurous and fun, the way they were supposed to be. And you'll spend less time searching for recipes and more time doing what you love... cooking!
Tips for Organizing Your Recipes
According to professional organizers, one of the best ways to keep your recipes is to store them in a 3 ring binder. The binders will help make your recipes easier to find, and the sheet protectors will help protect your recipes from sauce spills and the flour, egg and grease splatter that often occurs while cooking. Separate your binder into categories such as breads, cookies, Thanksgiving meals, Christmas meals, appetizers, soups, and salads etc. so you'll know exactly where they are when you need them. You may even use a separate binder for each food subject, if you'd like.
Organizing Your Cookbook Recipes
Do you have a scrumptious recipe that you've tried from one of your favorite cookbooks that you would like to cook again, but you can't figure out which cookbook it's in? Experts suggest marking your favorite cookbook recipes with sticky tabs to make them easier to locate. Writing notes on the pages of the recipes you've tried, such as ingredients added or omitted and variations in cooking times etc., can help ensure that your favorite recipes are pulled off without a hitch, every single time!
And for those counter tops and cabinets that are cluttered with cookbooks, professional organizers suggest purging the cookbooks you don't use, leaving only the cookbooks you truly love. Simply donate the unused cookbooks to places like Goodwill, and you'll have more space for lounging and food prep. Experts suggest rearranging your cookbooks, periodically, to make the cookbooks you use the most during each season or occasion easier to locate. For example, the soup recipes you used all winter long can now be moved to the back to make more room for the grilling recipes you need this summer.
Professional Kitchen Organizer
Are you feeling a bit overwhelmed with organizing your recipe collection? A professional kitchen organizer can help you unclutter your kitchen space and your recipes to help make your kitchen more comforting and inviting. Professional organizers act sort of like a coach to help you manage dreaded organizing tasks. They access your space, based on your concerns, then help you establish a system for uncluttering and preventing future clutter from reoccurring. A professional home kitchen organizer usually charges by the hour, but some charge by the day or by the project.
Organizing your recipes could be the first step in organizing your life; once you tackle the kitchen, who knows what else you can do! A professional home organizer can not only help you manage your recipes, but they can also work with you to help you eliminate clutter, set goals, and stay organized. They come equipped with their own organizing materials, but can also utilize extra storage materials you may have laying around in your house. Professional organizers help organize your kitchen cabinets, drawers, refrigerator, pantries, and more.
Robert Mizrahi
Professional Organizer in NYC
Chaos Commandos
The Benefits or Organizing Your Recipes
Over the years, recipes passed down from your grandmother or mother, torn from magazine pages, or even printed from your favorite online sites can really begin to add up. Then, when it comes time to finally trying them, you can't locate them, or it takes you forever to find them, which can really zap the fun and energy out of cooking.
Organizing your recipes helps take the stress out of cooking by helping you organize and manage your recipes for easy retrieval every time. Well organized recipes can help unclutter your counter tops, junk drawers, cookbooks, and recipe boxes and make using recipes adventurous and fun, the way they were supposed to be. And you'll spend less time searching for recipes and more time doing what you love... cooking!
Tips for Organizing Your Recipes
According to professional organizers, one of the best ways to keep your recipes is to store them in a 3 ring binder. The binders will help make your recipes easier to find, and the sheet protectors will help protect your recipes from sauce spills and the flour, egg and grease splatter that often occurs while cooking. Separate your binder into categories such as breads, cookies, Thanksgiving meals, Christmas meals, appetizers, soups, and salads etc. so you'll know exactly where they are when you need them. You may even use a separate binder for each food subject, if you'd like.
Organizing Your Cookbook Recipes
Do you have a scrumptious recipe that you've tried from one of your favorite cookbooks that you would like to cook again, but you can't figure out which cookbook it's in? Experts suggest marking your favorite cookbook recipes with sticky tabs to make them easier to locate. Writing notes on the pages of the recipes you've tried, such as ingredients added or omitted and variations in cooking times etc., can help ensure that your favorite recipes are pulled off without a hitch, every single time!
And for those counter tops and cabinets that are cluttered with cookbooks, professional organizers suggest purging the cookbooks you don't use, leaving only the cookbooks you truly love. Simply donate the unused cookbooks to places like Goodwill, and you'll have more space for lounging and food prep. Experts suggest rearranging your cookbooks, periodically, to make the cookbooks you use the most during each season or occasion easier to locate. For example, the soup recipes you used all winter long can now be moved to the back to make more room for the grilling recipes you need this summer.
Professional Kitchen Organizer
Are you feeling a bit overwhelmed with organizing your recipe collection? A professional kitchen organizer can help you unclutter your kitchen space and your recipes to help make your kitchen more comforting and inviting. Professional organizers act sort of like a coach to help you manage dreaded organizing tasks. They access your space, based on your concerns, then help you establish a system for uncluttering and preventing future clutter from reoccurring. A professional home kitchen organizer usually charges by the hour, but some charge by the day or by the project.
Organizing your recipes could be the first step in organizing your life; once you tackle the kitchen, who knows what else you can do! A professional home organizer can not only help you manage your recipes, but they can also work with you to help you eliminate clutter, set goals, and stay organized. They come equipped with their own organizing materials, but can also utilize extra storage materials you may have laying around in your house. Professional organizers help organize your kitchen cabinets, drawers, refrigerator, pantries, and more.
Robert Mizrahi
Professional Organizer in NYC
Chaos Commandos
Friday, May 9, 2014
Proper Disposal of Common Household Chemicals
A surprising number of products we use in our homes everyday contain chemicals that can be hazardous to the environment and even to us if used, stored or disposed of improperly. It is extremely important to understand the correct ways to dispose of these common chemicals. We encounter these chemicals so often that they can seem innocuous, but it is vital that you always keep in mind that they are chemicals and should be treated as such.
Just because a container is empty does not mean you can simply throw it into your trash, and you should never pour any leftover products down your sink. Always consider where these chemicals and chemical residues are going to end up after you have used them. In addition, you should always completely read usage instructions and warnings on labels. Store any chemicals out of reach of children and ensure that they are closed tightly to keep them from spilling or potentially mixing with other chemicals. Mixing products containing certain chemicals can cause serious health risks.
Products Containing Chemicals
Many everyday cleaners, like oven cleaners, spot cleaners and drain cleaners, use potentially harmful chemicals as do all aerosol products. Floor wax and furniture polish can also have chemical ingredients. Batteries also contain chemicals, along with paint, nail polish, hair dye and even fluorescent light bulbs. Keep an eye out for products labeled as corrosive, containing lye, phenols, petroleum distillates or trichlorobenzene. Bleach is both one of the most common as well as one of the most hazardous household products.
How Not to Dispose of Chemicals
Never pour any products containing chemicals down your sinks or toilets. Drain cleaners should only be used as instructed, and although they are intended to go down your drains, using these products can result in the chemicals seeping through your pipes and into the ground. There are other alternatives to chemical drain cleaners that pose less risk and these should be used whenever possible. You should certainly never dump any chemical products outside onto the grass, in ditches or bodies of water. The long-term effects of a lot of chemicals on the environment are still being studied by researchers. Not only do the chemicals affect plant-life and wildlife, but they can come back to haunt us as well in our groundwater and soil.
Empty containers also cannot just be put into your trash can. In many places, it is illegal to do so. Chemical containers can no longer be taken to the same waste locations with common garbage - again, this is due to their effects on the environment. They also pose a risk to sanitation workers who unwittingly come in contact with them. Putting products into the trash can cause the remaining material to leak out. Not only are most chemicals harmful in and of themselves, but they can also combine with other chemicals and have reactions. Some chemical combinations can result in explosions or even the creation of harmful gases that can hurt you and your family.
Proper Disposal Techniques
The key to dealing with products that contain chemicals is to treat them as hazardous waste - because that is what they are. When in doubt, read the instructions on the label. Most all products today include helpful instructions about how to correctly and safely dispose of them. Many communities have community hazardous waste centers or offer hazardous waste collection days throughout the year. Some have even instituted specific hazardous waste pick-up days for added convenience if you cannot drop off your containers and other products. This makes disposing of chemicals much easier and much safer for everyone. Check your community's website or speak to a town official to find out what is offered in your area.
Contact businesses in your area as well. Many businesses that work with a lot of chemical products engage in the recycling or collection of hazardous chemical material. Automotive service stations as well as paint stores are a good place to start because they regularly have to properly dispose of their own chemical containers and leftovers. These businesses will often allow others in the community to drop off their own household chemical containers.
Robert Mizrahi
Chaos Commandos
NYCOrganizers.com
Just because a container is empty does not mean you can simply throw it into your trash, and you should never pour any leftover products down your sink. Always consider where these chemicals and chemical residues are going to end up after you have used them. In addition, you should always completely read usage instructions and warnings on labels. Store any chemicals out of reach of children and ensure that they are closed tightly to keep them from spilling or potentially mixing with other chemicals. Mixing products containing certain chemicals can cause serious health risks.
Products Containing Chemicals
Many everyday cleaners, like oven cleaners, spot cleaners and drain cleaners, use potentially harmful chemicals as do all aerosol products. Floor wax and furniture polish can also have chemical ingredients. Batteries also contain chemicals, along with paint, nail polish, hair dye and even fluorescent light bulbs. Keep an eye out for products labeled as corrosive, containing lye, phenols, petroleum distillates or trichlorobenzene. Bleach is both one of the most common as well as one of the most hazardous household products.
How Not to Dispose of Chemicals
Never pour any products containing chemicals down your sinks or toilets. Drain cleaners should only be used as instructed, and although they are intended to go down your drains, using these products can result in the chemicals seeping through your pipes and into the ground. There are other alternatives to chemical drain cleaners that pose less risk and these should be used whenever possible. You should certainly never dump any chemical products outside onto the grass, in ditches or bodies of water. The long-term effects of a lot of chemicals on the environment are still being studied by researchers. Not only do the chemicals affect plant-life and wildlife, but they can come back to haunt us as well in our groundwater and soil.
Empty containers also cannot just be put into your trash can. In many places, it is illegal to do so. Chemical containers can no longer be taken to the same waste locations with common garbage - again, this is due to their effects on the environment. They also pose a risk to sanitation workers who unwittingly come in contact with them. Putting products into the trash can cause the remaining material to leak out. Not only are most chemicals harmful in and of themselves, but they can also combine with other chemicals and have reactions. Some chemical combinations can result in explosions or even the creation of harmful gases that can hurt you and your family.
Proper Disposal Techniques
The key to dealing with products that contain chemicals is to treat them as hazardous waste - because that is what they are. When in doubt, read the instructions on the label. Most all products today include helpful instructions about how to correctly and safely dispose of them. Many communities have community hazardous waste centers or offer hazardous waste collection days throughout the year. Some have even instituted specific hazardous waste pick-up days for added convenience if you cannot drop off your containers and other products. This makes disposing of chemicals much easier and much safer for everyone. Check your community's website or speak to a town official to find out what is offered in your area.
Contact businesses in your area as well. Many businesses that work with a lot of chemical products engage in the recycling or collection of hazardous chemical material. Automotive service stations as well as paint stores are a good place to start because they regularly have to properly dispose of their own chemical containers and leftovers. These businesses will often allow others in the community to drop off their own household chemical containers.
Robert Mizrahi
Chaos Commandos
NYCOrganizers.com
Subscribe to:
Posts (Atom)


